Fruit

Tarte au citron: Lemon tart recipe

For my annual festive lunch this year,  I made a large lemon tart.  Tarte au citron definitely ranks up there as one of my all time favourite desserts.  I adore lemons and use them prodigiously in my everyday cooking….thinly sliced in salads, lemon and oil as a salad dressed, squeezed liberally into smoked trout pate, hummous or baba ganoush.  As part of a tingling morning drink mixed with orange juice.   If you can get hold of Amalfi lemons they are wonderful – try  Natoora or a specialist greengrocers.  If not try and use unwaxed lemons from a supermarket – better flavour and the zest tastes amazing!

It’s fear of pastry that puts most people off making any kind of tart.  Pastry is really not that difficult – it takes some practice and you have to follow some basic rules such as using cold butter, resting the dough in the fridge for at least an hour before using, handling the pastry as little as possible and a very particular method of putting the pastry into the tart case which I learned when I was an apprentice cook at Stevie Parle’s Dock Kitchen.  This method of blind baking does not require the faff of baking beans or suchlike.  Over the past year my pastry skills have improved so much so that I was really quite proud of the edge of the pastry.

Serves 12-14 people

FOR THE PASTRY

350g plain flour
a pinch of salt
175g unsalted butter (cold), cut into cubes
100g icing sugar
3 egg yolks

FOR THE FILLING

finely grated zest and juice of 7 lemons
350g caster sugar
6 whole eggs
9 egg yolks
300g unsalted butter, softened

Pre heat the oven to 160ºC/325ºF/Gas 4

For the sweet pastry, pulse the flour, salt and butter in a food processor until the mixture resembles coarse breadcrumbs.  Add the icing sugar followed by the eggs yolks and pulse.  The mixture will immediately leave the sides of the bowl and combine.  Spread out a 30 cm piece of cling film on a surface, remove the pastry, bringing it together with the help of the cling film and chill in the fridge for at least one hour.

Coarsely grate (yes grate!) the pastry into a 30cm (12 inch) loose bottomed fluted tin, pressing it quickly, evenly and firmly onto the sides and base.  Try not to work the pastry too much.  Put the tart shell in the freezer for 15 minutes until hard, then bake in the oven for about 15 mins or until pale brown and firm to the touch.  (NB try not to over cook the shell as it will require further baking when filled).  Let the case cool off for 15 mins while you make the filling.

Put all the ingredients except the butter in a large saucepan over a very low heat, and whisk until the eggs have broken up and the sugar has dissolved. I recommend whisking the whole eggs in a little bowl with a fork before adding to the lemon juice, zest and sugar.  It will then be easier to amalgamate the 9 eggs yolks.

Add half the butter and continue to whisk.  At this point the eggs will start to cook and the mixture should coat the back of a metal spoon.  Add the remaining butter and continue stirring until the mixture becomes very thick.  It is important to continue whisking throughout the cooking process to prevent the mixture from curdling.  Remove from the heat, place on a cold surface (this stops the cooking process) and continue to whisk until the mixture is lukewarm.

Raise the oven temperature to 230ºC/450ºF/Gas 8

Spoon the lemon filling into the pastry case and bake until the top is brown.  This should take about 8-10 mins.  If like me, you like little brown spots on your lemon tart –  place the tart under an oven grill keeping a wary eye lest it should burn.  My grill is quite fierce so turning the tin helps an even browning. If you do find that your pastry edges are burning – cut a thin long length of foil and apply to the edge of the tart to protect it while it is under the grill.

Remove from the oven and allow it to cool before slicing.
Serve with crème fraiche or solo with an artfully placed splash of fruit couli next to each slice.

photograph: Mad Dog TV Dinners

Note:  9 egg yolks means nine lots of egg whites.  You can make coconut chocolate macaroons (David Lebovitz has a great recipe!) or financiers with the leftover egg whites. Egg whites can be also be frozen very successfully in small freezer bags though make sure to label with the number of whites before freezing.

Tarte au citron: Lemon tart recipe Read More »

Autumn fruit crumble

There’s nothing more comforting, as the nights draw in, than a crumble made with the last of the blackberries combined with Turkish figs and this season’s bramley apples.

You can be inventive with your fruit combinations.  I just happened to have some fresh figs.  The week before I used redcurrants in place of the figs but alas, they are not to be found.  I use ground almonds in the topping as they are readily available but if you can find ground hazelnuts (a rareity these days) or best of all, whole hazelnuts  –  grind them in a processor and mix in with the topping.  I buy my hazelnuts from Natoora who supply restaurants but are happy to take retail orders online.

This recipe serves 4 and I trebled the ingredients as I was making it for a 12 people.

Ingredients
a good knob of butter
3 large Bramley apples, peeled, cored and chopped
75g caster sugar
150g blackberries or any other wild berries, blueberries or elder berries.
2 figs cut into pieces
zest of a lemon

Toppping:  
40g cold unsalted butter, cut into cubes
30g ground almonds or hazelnuts
60g sugar
80 g plain flour
good handful of rolled oats

cream, creme fraiche, vanilla ice cream or plain yogourt, to serve

Preheat the oven to 190 C/375 F/gas 5.  For the filling, melt the knob of butter in a wide pan, add the apples and sugar and cook for 6-8 minutes, stirring ocassionally, until the apples begin to break down, but are not too soft.

Take off the heat and stir in the blackberries and figs, then add the lemon zest. Put all the filling into a medium size ovenproof pie dish or individual dishes if you prefer.

For the topping, mix the unsalted butter, almonds, sugar, plain flour in a food processor, or rub between your fingers – the purist way –  until it looks like breadcrumbs.  Finally mix in the rolled or porridge oats which give the topping some texture.

Sprinkle the crumble topping over the filling and bake in the middle of the oven for 3o – 40 minutes or until the top is golden brown.  Serve it with cream, creme fraiche, vanilla ice cream or plain yogourt.  I served mine with Tim’s Dairy Greek style natural yogourt.  It’s lovely and thick and goes a treat with crumble.

Autumn fruit crumble Read More »

Gooseberry and Elderflower Syllabub

I love tart English fruit.  Rhubarb, Redcurrants, Damsons and through the summer when most of our summer berries are red – along come gooseberries. Lovely pale green, sometimes golden or red flecked,  hairy  goosegogs appear in our shops in from June to August. Evocative of 50s childhood puddings and making a comeback – gooseberry fool, crumble, pie, tart and not forgetting   gooseberry jam and jelly.  Gooseberry Sauce was traditionally eaten with mackerel and other oily fish.   There is still an annual Gooseberry Show at Egton Bridge in North Yorkshire on the first Tuesday in August where the grower with the largest gooseberry wins.

I found this delightful recipe on James Ramsden’s Small Adventures in Cooking site.  Guest posted by Evie of saffron-strands.blogspot.com. I’ve adapted it and reduced the amount of sugar as I prefer a slighter tarter tasting  syllabub.  Gooseberries are really easy to prepare and require very little cooking.  The base for most gooseberry dishes call for the fruit to be stewed and sweetened according to the sharpness of the fruit.

Ingredients
100ml Sauternes or Muscat wine
finely grated zest of a lime
35g caster sugar
300ml double cream
600g gooseberries
80-100g caster sugar, adjust according to taste
2 tbsp elderflower cordial, homemade or shop bought is fine
50g blanched almonds, lightly toasted in the oven

Mix the first three ingredients together in a small bowl and allow to stand for a couple of hours or overnight so that the flavours are well blended.

Wash and top and tail the gooseberries.  Slowly dissolve 80 -100g caster sugar together with the elderflower cordial in a heavy bottomed pan.  Add the gooseberries and cook gently until the fruit is soft but not collapsed – approx 10/15 mins.  Leave to cool completely then place in the fridge.

Whip the double cream until at very soft peak stage and then slowly mix in the sweet wine, lime zest and sugar mixture until it is all incorporated – take care not to over beat the cream mixture!  If it seems too loose don’t fret as it will stiffen once it is chilled.  Spoon the gooseberry mixture into individual serving glasses, half filling the glass and top with the syllabub.  Refrigerate for at least 2 hours – it will keep in the fridge for at least 24 hrs and when ready to serve, finish off by sprinkling with the toasted almonds.  Watch it disappear!

Serves 4-6 depending on the size of glass used.

More gooseberry recipes and further reading for gooseberry fans:

Jane Grigson’s classic Fruit Book – (Penguin Cookery Library)  beautifully written section about the gooseberry with some traditional recipes.
Hugh Fearnley-Whittingstall’s Gooseberry Recipe’s from The Guardian’s Life&Style
RHS Grow your Own Gooseberries: Essential information for those wanting to grow their own gooseberries.

Gooseberry and Elderflower Syllabub Read More »

Prodigious Strawberry Pavlova

Prodigous Strawberry Pavlova

In between a hectic round of street parties over the Jubilee weekend, I wanted to make a dessert for a gathering on Monday evening.  As I had several boxes of really good strawberries, eggs, home made caramel and a time limit …. strawberry pavlova was an obvious choice.  I pre-made the meringue base on Sunday night, pre-prepared the strawberries and chantilly cream on Monday morning and went to a lunch time street party knowing all would be well.

The recipe is adapted from one by Nigella Lawson, substituting strawberries for her raspberries and using chantilly cream for extra ooomph.  If you want to you could use strawberries and raspberries, adding passion fruit and lychees as Nigella does in hers. I find it all those different fruits too much for a pavlova! I much prefer the classic simplicity of strawberries, chantilly cream and meringue.

For the base

8 free-range egg whites
500g caster sugar
4 tsp cornflour
2 tsp white wine vinegar
½ tsp vanilla extract

For the topping

600ml double cream
45g icing sugar
2 boxes of strawberries (hulled, quarter larger ones & soak in bowl with caster sugar to taste).
Caramel to drizzle over.

Preheat the oven to 180ºC/350ºF/Gas 4
Line a baking sheet with baking parchment and draw a 25cm/10inch diameter circle onto it with a pencil.
In a bowl or stand mixer whisk the egg whites until soft peaks form when the whisk is removed.  Slowly whisk in the sugar one tablespoon at a time, until you get stiff peaks when the whisk is lifted out of the mixture.

Sprinkle in the sifted cornflour, adding the vinegar and vanilla extract to the egg whites and fold in gently with a metal spoon.  I use a stand mixer so just give it a few revolutions of the whisk attachment to make sure everything is mixed in.  It is the addition of the cornflour and vinegar which keeps inside of the pavlova soft and marshmallow like.

Spoon the meringue mixture on the baking parchment within your marked circle and using a spatula, flatten the top and smooth the sides.

Place in the oven and immediately reduce the heat to 120ºC/250ºF/Gas ½.  Cook for an hour, then turn off the oven and leave to cool completely.

Once cool, remove the meringue based from the oven (you can keep it in an airtight container for a couple of days or store in a freezer for up to one month).

As the base can be quite fragile, I tend to trim the excess baking parchment off with scissors and find a large flat dish on which to assemble the pavlova.

For the topping I make chantilly cream by whipping double cream in a stainless steel bowl (glass will do) which has been chilled beforehand in the freezer.  Wipe the bowl and pour in your cream and beat until cream forms soft peaks.  Then mix in your sieved icing sugar being careful not to over beat.  The cream should be firm but still light in texture.

Spoon the cream onto the meringue base, spreading it outwards to the edge of the base.  Then load on your strawberries and dribble on the juices (the addition of a little sugar to the cut strawberries encourages the juices out of the strawberries (masceration).

Finally take your caramel and if you need to soften it place the jar in a bowl of boiled water) and drizzle all over the top of the pavolva.  Indulge and enjoy.

I will post a recipe for making caramel very soon.  It really isnt difficult to make and can be stored in the fridge in a jars for several weeks.  If you don’t have any caramel to hand, you could make a fruit couli using fresh raspberries and icing sugar.  Whizz them in a food processor and blend into a smooth sauce and
ideally pass through a sieve to remove the pips. Drizzle liberally all over the strawberry & cream covered pavlova.

Prodigious Strawberry Pavlova Read More »

Apple pressing

mixed variety eating apples
apple washing
home confectioned apple pulveriser

This weekend, an hour before the snow arrived, I’d brought in a good supply of logs for the fire – I fancied a warming glass of  mulled apple juice.  My stash of Chiltern apple juice in the cupboard under the stairs would be just the ticket.  I glugged the contents of the bottle into a pan, added my chosen spices along with a nip of calvados,  warmed it all up slowly and sat down next to the fire, glass in hand, while the snow flakes danced.

I’d been invited to join in a communal apple pressing party at some friends Karen and John along with other local apple juice lovers .  The Venue: A back garden in Wendover, in the heart of the Chilterns.  Apple pressing is most definitely a communal activity with several stages to get stuck into before the actual pressing begins.  Sorting and combining different varieties to get the right balance of flavour.  Then there’s the washing, the chopping and the pulping.   When we arrived the back yard was awash with plastic bags, boxes and crates crammed with apples of all sizes and varities – many left there by locals with more apples in their gardens than they could use. Friends and neighbours, happy in the knowledge that they’ll be able to turn up a day or so later to collect a bottle or three of lovingly pressed apple juice.

pulping apples ready for pressing
chopping apples prior to pulping

Not only do Karen and John provide their local community with a first rate apple pressing service, using local apples brought along by neighbours and friends  but they also grow fruit and vegetables in their well stocked garden,  keep a small herd goats on 5 acres of land at the top of the hill.  Then there’s the bees housed in another garden close to fruit trees with their spring blossom.  Karen and John sell the honey at their local farmer’s market. On top of working full time – Karen is president and John the Membership Secretary of the Mid Bucks Beekeepers Association which offers beginners courses in beekeeping alongside a full programme of yearly events and educational activities.

Best of all, I love the fact that John and Karen have been clever and resourceful building their own apple press using recyled materials.  Cannabising an old bedside table in which sits houses an old waste disposal unit, with a plastic bowl above it as a hopper for the apples to fall down inside the unit and get pulped.  The wooden plunger is made out of plywood with plastic green fork handle for easy use. The pourous material lining the wooden trays which contain the apples – is simply net curtains picked up at a car boot sale.  Why net curtains and not muslin?  Karen explained that muslin absorbs too much liquid whereas the net curtains are nylon so don’t absorb liquid – making them perfect for the job.  I’m impressed by this sheer inventiveness of it all. The uprights of the press itself  are made using solid beams of wood once part of a wooden climbing frame you would find in an old style school gym.  Even the dried, spent apple pulp (rather beautful with its flecks of green and red)  is recycled! – it’s bagged up and fed to the goats who apparently love it.  Well…. goats will eat everything and anything!!

pouring apple pulp into net curtain lined tray
adjusting pressure to the press
last minute adjustments before final pressing
foaming apple juice being squeezed out
much needed cuppa with Karen’s homemade Victoria sponge
spent, pressed apple pulp after pressing
bagging up the pressed apples for the goats  

Once all the apples for the day had been pressed, we moved on to the bottling and pasteurising stage.  John had adapted a large boiling unit which he picked up at Lidl to pasteurise the apple juice.  This stage is necessary if you are not going to freeze your juice.  We decanted the juice into glass bottles and brought the temperature of the water up to 72 degrees centigrade for approx 20 mins.  You can replicate this process using a large stock pot or jam preserving pan, placing a round, metal cake stand on the bottom of the pan so that the water can circulate freely underneath the bottles and stops the bottles rattling or even cracking. I do this when I’m bottling my damson ketchup which needs to be pasteurised after bottling.

pasteurising our bottled apple juice at 72 degrees C
apple juice ready to drink

We worked hard all afternoon, enjoying the convivial company and the crack.  By the end of the day  we’d pressed well over  100 litres of apple juice!!  It was great fun meeting and working with new people – processing kilos of  apples and transforming them into fantastic tasting amber apple juice.  I returned to London that evening,  shattered but happy – with my four large bottles of apple juice and the idea of joining in with another apple pressing afternoon the following year.

Here’s the recipe I used for my mulled apple juice.

1 Litre of apple juice
whole cloves (8 or more)
whole allspice (6or so)
2 star anise
2  sticks of cinammon
pieces of peel of one orange (no pith)
shot glass of calvados (omit if you prefer a non-acoholic version)

John recommends vigopresses.co.uk for lots of useful information on pressing, crushing apples, fruit as well as cider making.  Some great recipes too.

Anybody who fancies making their own press or cider making should visit the UK Cider pages at https://cideruk.com/ where there is loads of useful info.

Apple pressing Read More »

Deep in damson country

Last autumn I got the damson bug.  I’ve always adored the tarter than tart taste of damsons.  The deep purple beauties appear in our shops in September and two or three weeks later they’re gone before you know it.  The damson season is just too short!

You can eat damsons when they are really ripe but cooking and preserving brings out the best in them.  Spurred on by a bare patch of soil in my garden where a wonderful plum tree once grew, I’d jumped on the idea that I could plant a damson tree and in about seven years (quite biblical!) enjoy crop of my own damsons.

I did my research and found the Westmorland Damson Association, based in Cumbria and got on the phone.  I talked to Bob Bradley, one of their members about the viability of planting a Westmorland Damson tree in my small London garden.  “Yes, why not?” said Bob – “I can sell you a small tree about 2 years old, if you’d like!” and that was that.   It seemed like months before the phone rang and it was Bob asking me if I still wanted the damson tree? Yes, definitely – but how to get it down here?  Bob and Sarah, Bob’s wife, would bring it down to London on the train as they were coming down anyway. We meet up at Euston Station,  got on famously and with the little damson tree in my arms , returned home and put my tree outside in the garden to acclimatise it before planting  out on a dry, warm day in July.

Keeping in touch with Bob and Sarah, I’d soon planned a weekend in Witherslack – deep in damson country.  I was curious to find out more about the Westmorland Damson  and of course, to pick as many damsons as I could bring back with me to London. Enough hopefully to make damson gin, damson cheese, damson jam and one or two other damson delicacies.

In mid September I headed up to Oxenholme Lake District station and 3 1/2 hours later I stepped off the train greeted by torrential rain and a smiling Sarah Bradley.   The village of Witherslack (a “wooded valley” in Norse) lies close to two valleys, the Lyth and Winster, famous for their damson orchards.

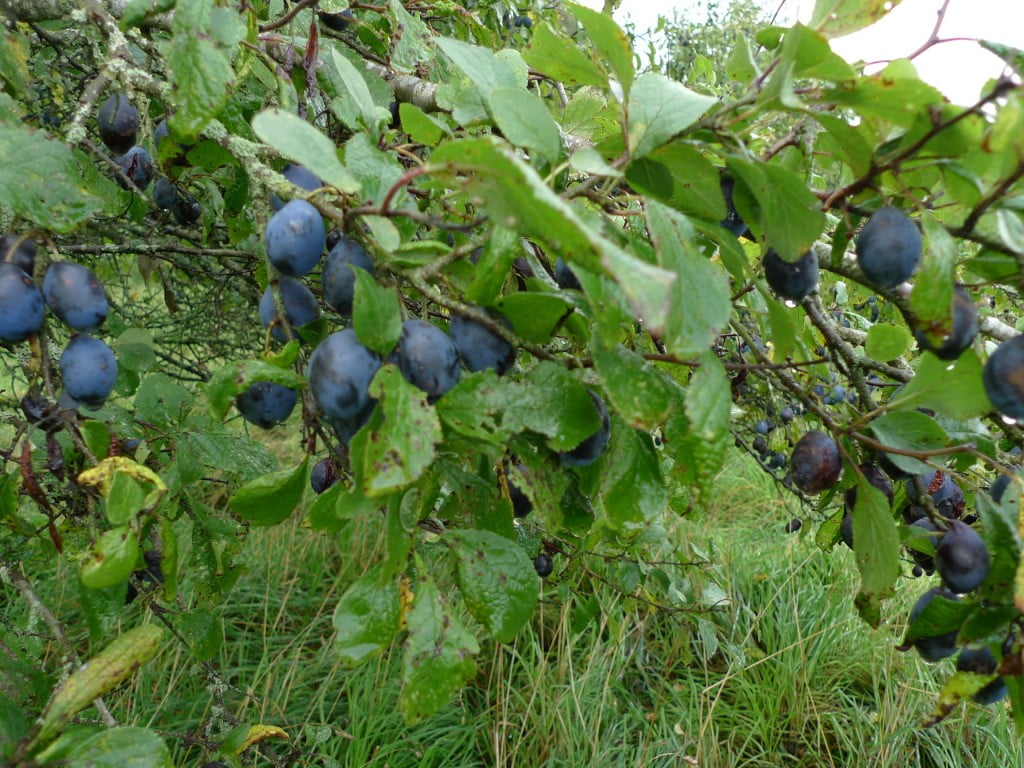
Damson trees grow very prolifically up here.  Damson trees are very hardy,  they thrive on the well-drained, limestone soils and benefit from the relatively mild climate of the area.  In the past, damsons weren’t just eaten as fruit but were used for dyeing in the textile.  Back in the 1930s and 1940s more than 300 tons of damsons were sent down to the jam factories of Lancashire and Yorkshire. The income from the damsons was often used to pay the annual rent of a farm.


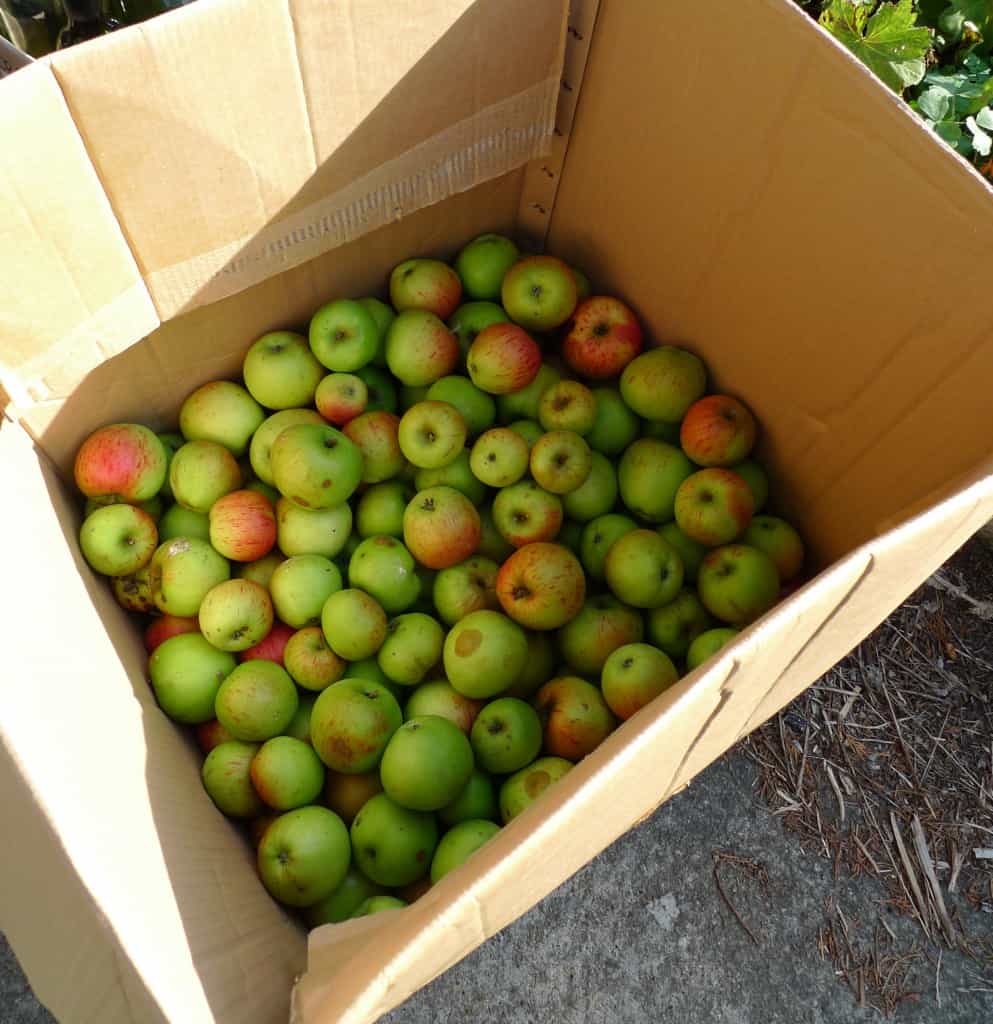
I’d been concerned that the rains in August might have spoiled this seasons’ fruit.  As we walked towards Bob’s damson orchard with more 30 damson trees (what bliss!!) my fear was banished.  There were plenty of trees laden with fruit waiting to be picked. Donning wellies and waterproofs and armed with large white plastic buckets, we began picking in the pouring rain.  Now that is serious dedication!

Every year, Bob Bradley opens his orchard to anyone who wants to come and pick his damsons.  An exceptionally fine spring this year, with plenty of pearly, white blossom combined with a frost free April, has produced a better than average crop of fruit.  An average size damson tree can produce up to 80 kilos of fruit!!

It carried on raining while we picked, my jacket sleeves becoming more and more sodden as I reached up into the leafy branches. Traditionally women picked the fruit hanging from the branches at ground level, while the men stood on wooden ladders to reach the upper branches.  With our buckets half full,  we lay the damsons out on towels and newspaer to dry them out before nipping inside for a warm up and a cheery cup of tea and back out for a second round of picking – and more rain!  Thoughts of all the wonderful things I’d be able to make with my damsons, keeping my spirits up.

Bob pointed out some baby damson trees – suckers, thrown up from the roots of mature trees growing  on one side of the orchard.  As long as the orchard is not grazed by sheep, these clones will eventually grow into mature trees within 5 or 6 years.  I didn’t know sheep liked eating young damson trees!  Bob explained that putting nesting boxes in the trees encouraged birds to eat the many parasitic insects such as greenflies which live on and around the bark and leaves of the trees.  There is even a plum moth!  A tasty takeaway for a fledgling blue tit hungry for it’s supper.

Bob, a retired vet, has lived in the area for over 40 years and as a member of the Westmorland Damson Association and keen fruit tree grower, there isn’t much he doesn’t know about damsons.  His knowledge and enthusiasm not just about damsons, apples and other indigenous  fruit trees, but plants and wildlife, is very impressive. Bob’s large cage with it’s lively pair of red squirrels which have already bred 5 young ones – a practical contribution to reintroducing a native species against a tide of  grey squirels . These five been released into the wild and hopefully there’ll be more to come.  I couldn’t resist taking a picture of them.  They have a plentiful supply of cob nuts from a handy nearby tree.


Sarah took me for a drive the length and breadth of the Lyth and Winster valleys to see the orchards where damsons have grown for many generations.  Many of these orchards have sadly become overgrown and neglected.  We  saw old damson trees by the side of the road,  unkempt and with a smattering of unpicked fruits.  We talked to a farmer on whose land the trees were  “We just can’t afford to pick the fruit and people don’t make as much home-made jam like they did in the past – they’d rather buy it in the supermarket.”


There are damsons in other parts of the British Isles but the intense flavour of the small oval Westmoreland damson (a type of Shropshire Prune) lifts it way above any others I have tasted.  It is very hard for local farmers with damson orchards to compete with the cheaper imported damsons from Eastern Europe. Transportation costs have soared, combined with a short picking season (just two weeks) and lack of cheap labour in the North West are significant factors.  However, a resurgence of interest in damsons along  with other traditional fruits (such as gooseberries)and many local farmers sell their damsons to small scale producers who make damson gin and damson beer, along with damson jam and other damson products which are not just sold locally but considerably further afield.


One local damson grower I met, told me that damsons are even being imported from Eastern Europe, shipped over to Denmark to be destoned and then sent back to the UK where they still manage to cheaper than our native ones. How on earth can this be possible!!!

For a hearty supper we prepared  Morecombe shrimps, egg and cheese in ramekins, locally produced Cumberland sausage (well Cumberland is in the Lake District!) accompanied by baked beetroot, spinach and Charlotte potatoes, all freshly pulled and picked from the Bradley’s garden.  Sarah and I swopped dessert recipes while she prepared a Witherslack Damson Cobbler (recipe below)  for pudding.   An aperitif of damson gin in front of the woodburner warmed us all up.  Then to supper washed down with several glasses of Bob’s excellent damson wine –  ruby red, full bodied and surprisingly dry. More Shiraz than damson.  A unforgettable meal with my new

I’ve already planned my next visit to “damson country” in early Spring to see the white damson blossom, and enjoy the annual festivities of Damson Day (Sat, 14th April 2012) organised by the Westmorland Damson Association.  The WDA  campaigns to promote the use of local damsons and by so doing, ensuring the continued survival of existing orchards.  They offer free help, advice and access to grant aid for anyone wanting to restore or create new orchards.  For more information, telephone 015395 68617 or email enquiries@lythdamsons.org.uk

WITHERSLACK DAMSON COBBLER

For the base:
1 kilo damsons
caster sugar, about 227g
water, enough to cover fruit

For the scone topping:
2 oz (57g) butter
8 oz (227g) self-raising flour
1 tspn baking powder
1 oz (28g) caster sugar
fresh or sour milk to mix

Stew the damsons, remove stones and put puree into a greased pie dish.  If you haven’t got time or inclination to puree the damsons – leave them in but don’t forget to warn people before they start eating!  Sarah left the stones in and we recited the traditional rhyme, “ Tinker, tailor, soldier, sailor, rich man, poor man beggar man, thief.” I think I ended up with a soldier – perish the thought!

Mix flour, baking powder and caster sugar and rub in butter.

Mix to a dough with about 7 tbspn of milk, roll out on a floured board and cut into small rounds.  Place the scones overlapping each other in a ring on the damsons, brush with milk and cook for about 30 mins near the top of a fairly hot oven.

Deep in damson country Read More »